Showing posts with label Tastefully Simple Recipes. Show all posts

Tastefully Simple Valentine's Day Treats

Monday, February 9, 2015

It is hard to believe but Valentine's Day is just around the corner! If you know me, you know I am a huge fan of holidays, especially ones that involve gifts and treats.  
 With my collaboration working with Tastefully Simple, I browsed the products and chose two that I thought were very Valentine's Day appropriate: Raspberry Chocolate Cheese Ball Mix and Black Cherry Slush Drink Mix.  Here is what I did with them:
 I started out by preparing the Black Cherry Slush Drink Mix.  It was super easy, I just washed out the bucket, added in the mix
 And some water.  Gave it a good stir and popped it into the freezer over night.
 Then I got to work on the Raspberry Chocolate Cheese Ball.  It starts with softened cream cheese
 And the mix.
 I gave it a good stir
 And scooped it into my serving dish
 Topped with the chocolate crumb topping
 And treat number one was done! Easy as that.
 I served it with the Tastefully Simple Twisty Grahams and it tasted like Raspberry Chocolate Cheesecake.  Yum!  Also, those little Twisty Grahams might just be my favorite Tastefully Simple product.  I thought I might have over-dosed on them during my pregnancy but nope, taste just as good not pregnant!
 Such a fun little treat for your sweetheart.
 For the cocktail, I removed the bucket from the freezer
 Scraped it with a fork
Then put the shavings in a glass 
And pour in some bubbly...yes champagne!  Is there anything more romantic than champagne?  I guess there are a few things like, foot rubs or letting your wife sleep in in the morning (Hint hint...).
 But a Black Cherry Champagne Slush and Raspberry Chocolate Cheeseball Dip come in at a close second :)
I hope you all have a wonderful Valentine's Day full of the ones that you love!  xoxo. 


Raspberry Chocolate Cheese Ball 

8 oz softened cream cheese 

Combine the cream cheese with packet one.  Once fully combined, spread into a serving dish or place in the refrigerator for two hours to harden.  If you go that route, you can shape into a ball and roll in packet two (chocolate crumbs).  If you place in a serving dish, sprinkle with the chocolate crumbs.  Serve with Twisty Grahams.  


Tastefully Simple Tonight Collection

Friday, September 19, 2014


As a new mom of a three week old, I am on the lookout for quick and easy meals.  We have been very fortunate to have many friends and family come to visit and bring lunch and dinner for us.  But,  at some point I knew we would to need to get onto our own two feet and I was going to need to get back in the kitchen.  Last weekend…that happened.  I went to the grocery store…by myself.  While I didn't love it, it did feel good to have a little normalcy and a reason to put on clothes besides yoga pants.  

My mom watched the baby while I shopped and made these awesome freezer meals from Tastefully Simple.  I was so excited to get the Tastefully Simple Tonight Collection in the mail!  It was seriously like Christmas morning.  Here is what came in the package 
 An envelope...
 Full of recipe cards and labels.  I'm a sucker for a label and these came with the cooking instructions right on them along with a space for the date.  So easy to just pop on the completed meal so there isn't any confusion when it is time to prepare.  Let's be honest, with a sleep deprived brain and baby in my arms, things are confusing enough!
 I also love the recipe cards and shopping list that came with the package.  It made it so easy to shop and follow along with the recipes.
 And here are the awesome products included in the Tastefully Simple Tonight Collection, starting at the left, Artichoke and Spinach Warm Dip Mix, Pot Roast Slow Cooker Soup Mix, Vidalia® Onion Dressing, Simply Salsa™ Mix , Mama Mia™ Marinara Sauce Mix, Bountiful Beer Bread Mix®, Perfectly Potato Cheddar Soup Mix and Creamy Buffalo Dip Mix.

I made a few of the freezer meals last weekend starting with the Mama Mia French Bread Pizzas and the Italian Pasta Casserole.  I modified things just a bit but it only took about 20 minutes to whip these two recipes up.
First I started by browning a pound of hamburger and Italian sausage in a skillet.
 I added a few shakes of Onion Onion™
 And Garlic Garlic™ because I love them and had them both on hand.  **Note that they do not come with the Tastefully Simple Tonight Collection**
 Once the ground beef and sausage were browned, I removed them and placed them on a paper towel lined plate.
 I then chopped up a green pepper
 And added it to the skillet
 Added the meat back to the pan, along with a can of crushed tomatoes.
 As well as the Mama Mia™ Marinara Sauce Mix.
 Pepperoni
 And a few mushrooms.  Gave it a good mix and it was time to assemble.
 I cut a large loaf of Italian bread into thirds
 Halved them then scooped out the insides just a  bit.
 Scooped the pizza mixture into each of the boats
 And topped with mozzarella cheese.
 That was it, just rolled each of the loaves up in tin foil and placed the sticker on one of the loaves.
 To make the Italian Pasta Casserole I just added cooked pasta to the pizza mixture
 And topped with shredded cheese
 Packaged it up with a layer of Press and Seal and tin foil.  Popped a label on and into the freezer it went.
 I also made the Vidalia Honey-Glazed Chicken Thighs but I subbed chicken breasts.  This recipe was super easy, just mixing up a few ingredients and pouring over the chicken in a freezer bag!
I also prepped Mom's Sunday Pot Roast.  This was the easiest with mixing the Pot Roast Slow Cooker Mix with water and pouring over a chuck roast.  Easy, easy! 
I couldn't wait to try the Mama Mia French Bread Pizzas so we made them this week.  Seriously, they only lasted 2 days in the freezer before we dug in!  They worked so well too!  I just took them out of the freezer the night before and put them in the fridge.  The night we ate them, I preheated the oven to 350 degrees and placed them on a cookie sheet.  Into the oven for 20 minutes and out came… 
These bad boys.  Seriously delicious and it was so so easy to make!  We devoured them.

Overall I was extremely impressed by the Tastefully Simple Tonight Collection of freezer meals.  I was able to make 6 of the 10 meals in an afternoon while my mom snuggled our sweet little girl.  I have to say, it worked out pretty perfectly.
While I worked on these meals by myself, Tastefully Simple offers Freezer Meal Workshops that allow guests to create meals to take home and put in their own freezer!   Guests pre-purchase the products and the consultants lead them through making the meals while learning about different Tastefully Simple products.  There are a variety of Freezer Meal Menus available which include crockpot meals, paleo-friendly recipes as well as a variety of kid-pleasing meals.  The three menus that are currently offered consist of 10 different recipes and take about 2 hours to assemble regardless of how many attendees as everyone is preparing their own meals.  I think it would be super fun to get a bunch of girls together, drink some wine (FINALLY!) and make a bunch of freezer meals to bring home.  If you are interested in hosting a Freezer Meal Workshop, feel free to contact a Tastefully Simple Consultant or visit their website here.

**DISCLAIMER: I was provided products and compensation for creating this post.  However, all opinions are honest and are my own.  As always, you can't buy my love, baby.**


Halloween Entertaining Ideas with Tastefully Simple

Friday, October 11, 2013

I have to say, Halloween is one of my favorite holidays.  I think it all started with my Dad, the ultimate lover of Halloween.  My mom would get us all bundled up (yeah, bundled up--can you imagine a little 4 year old with a purple princess dress and telling her she has to wear a SNOW SUIT because it just snowed over a foot!?  It didn't go over that well, let me tell you...) and out the door in record time to get to every house possible.  We lived in the sticks, like literally, the middle of the woods and since we couldn't go door-to-door, my dad would drive us everywhere to trick-or-treat.  We would see our neighbors, relatives (we couldn't miss my Grandma's homemade popcorn balls), my dad's customers and of course all of the houses of people we only "knew" one night a year--the ones who gave away FULL sized candy bars.  We would come home absolutely exhausted with huge bags of candy and amazing memories we still hold on to today.  

These days I deck the house out, make festive food and enjoy every little trick-or-treater that rings our doorbell.  I think back to our trick-or-treating days and honestly pray that it doesn't snow like it did "that one year."  

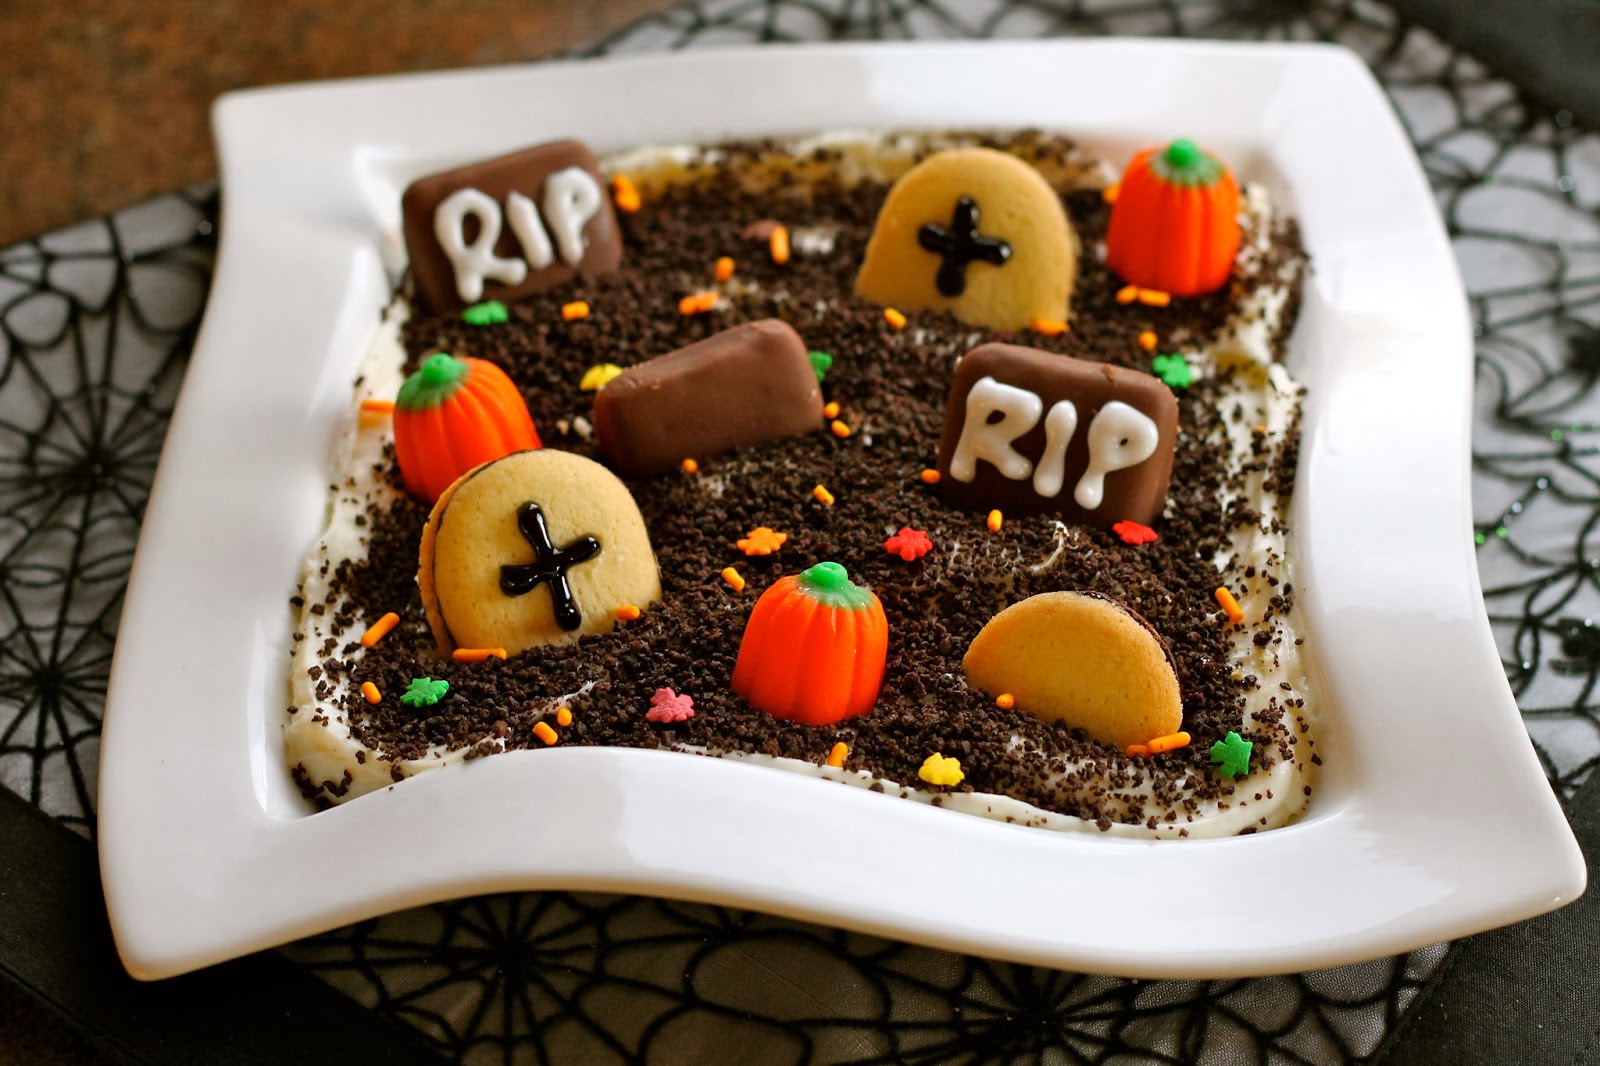
When Tastefully Simple asked if I would do a Halloween Post for October let's just say they didn't have to ask twice.  So today, I used two of their fun products and with a little inspiration from them, I whipped up two quick and easy Halloween Treats.  First is the Amaretto Graveyard, it looks super impressive and would be the centerpiece of your treat display but honestly took just a few minutes to whip up.  The second is the Samba Scare-tini.  Wow, was I impressed by this cocktail, and it's such a pretty color!  

Here is how I did it...
Start with a box of their Awesome Amaretto Cheese Ball Mix ™  
Toss a block of cream cheese (I used a reduced fat version) in a small bowl
Pour in the Awesome Amaretto Cheese Ball Mix ™ ...
And, well, mix.  
Until it is fully combined.  As you can see I started with a fork and moved to a spatula.  The spatula worked much better
Spread it out onto your serving plate
Like so and set it aside for the time being
Then get to work on the tombstones...this was VERY easy!  Don't mind my gross cutting board, I swear it's clean...and I should probably just toss it at this point.  ::mentally adding cutting boards to my birthday/Christmas list::
Pipe on RIP or crosses on the tombstones
I also used these little chocolate covered graham crackers for tombstones as well.  Ps. when's the last time you had one of those?! With coffee, wow, that's all I'm saying.
Anyways, pipe RIP or crosses or whatever creepiness you would like to on them as well.
Sprinkle the chocolate crumbs onto the top
And place the tombstones.
I added little pumpkins that come in the "autumn mix" candy corn bags.
And a few fall sprinkles.
There you have it!
I mean come on, how adorable is that!?  And it took less than 30 minutes to make--maybe even 15 minutes total.  Man, I should have timed myself!
On to the Samba Scare-tini!  I started this the night before hence the lighting.  First, you take the bucket and rinse it out
Pour the Samba Sangria mix ™ x into the bucket
Add vodka...now we are talking!
Some water
And give it a quick stir
Cover
And into the freezer it goes for 12-14 hours.  Truthfully I left mine in the freezer for two days since it RAINED all weekend.
Anyway, take it out of the freezer.  Another confession, the day before I took a peek and kind of "fluffed" the mixture up with a fork to see how it was doing...that's why the top isn't completely flat.  Know that step is not necessary.
Anyway, just scrape the mixture and add it to martini or any other pretty glasses you may have.
Serve with festive straws and you have got the easiest party drink you will ever serve!
I love that you can serve a slushy party drink without standing over the blender the entire night!
I also tried it by adding a little lemon lime soda and to be honest, I liked that even more than the original!

It was slushy perfection!

Now, I'm dying to know...what are your favorite Halloween memories and recipes you would like to share!

If you would like to purchase the Awesome Amaretto Ball Mix ™ and Samba Sangria Mix ™ from Tastefully Simple, check out their website here!  They are doing a special for these Halloween recipes and a few others that would complete your Halloween party menu!  10% off for the month of October! I am certain that your party would be a hit and think about how easy it would be to get everything put together!

Happy Halloween!!!!!


**NOTE: I was provided with products for this post and compensated for working with Tastefully Simple in Project Simplicity.  As always, the opinions are my own.**


Made With Love By The Dutch Lady Designs