Showing posts with label entertaining. Show all posts

Iced Coffee Bar

Friday, July 5, 2013

One of my favorite things to do when entertaining is having some sort of "bar."  It allows my guests to customize what they are having while also having them interact and have something to talk about.  It's always "hey what are you having" "what did you put in yours."  

For the recent Stella and Dot Trunk Show I recently hosted, I thought I would do some sweet treats and what goes better with sweets than coffee?  Well, nothing except when its 80 degrees out.  So, I decided to do an iced coffee bar.  I have to tell you, it was a hit!  
 Start the day before with a pound of ground coffee.
 Pour it into a large container
 And add 2 gallons of cold water.
Give it a stir and pop it in the fridge preferably over night. 
The next day it will look a bit like this…sludge.  
 Prep a strainer with some cheese cloth.  We ended up straining it twice, once like this an once with cheesecloth and a coffee filter that we deconstructed.
 Pour it through the strainer and into a pretty serving pitcher.  If you are just using it for yourself, pop it in a container that has a lid so you can enjoy it all week!
 To serve, fill a glass with lots of ice, and pour the coffee over the top.
 For some decadence, drizzle in some sweetened condensed milk.  This was my all time favorite.
 Pour in a little half and half, milk or if you are feeling naughty a little heavy cream.
If you like things even sweeter, a little vanilla syrup takes things over the top! 

 Give it a quick stir
And this is the best iced coffee you will ever drink!

I loved having an iced coffee bar at the party!! Be sure to stock lots of ice, milk, cream, half and half, flavored syrups (I had vanilla and hazelnut), along with a simple syrup since regular sugar won't dissolve as nicely since the coffee is cold.  Have an iced coffee bar at your next party and I think you, and your guests will really enjoy it!

Iced Coffee Bar

For the Iced Coffee:
1 pound ground coffee
2 gallons cold water

For the Bar:
Simple Syrup (recipe below)
Half and half
Heavy Cream
Milk
Flavored syrups (hazelnut, vanilla, cinnamon ect…)
Sweetened condensed milk
Lots of ice

To Prepare:

The day before, pour the coffee into a large container.  Pour in the cold water and give it a good stir.  Place a cover on the top and into the fridge it goes for at least 4 hours…preferably over night.

Once the coffee has sat for at least 4 hours, line a fine mesh strainer with a deconstructed coffee filter and cheese cloth.  Pour the coffee mixture to strain over a large container.  If you are serving the coffee, pour it into a pretty container and place in the fridge until you are ready to serve.  If you are having it for yourself, just  be sure to put it into a container with a lid so you can enjoy it all week.

To Serve:

Fill a large glass with ice and pour in the iced coffee but be sure to leave room for the accouterments.
Customize you and your guests drinks by adding the half and half, cream, milk, flavored syrups and sweetened condensed milk to your taste!

Enjoy!

Coffee recipe via: Pioneer Woman


**Simple Syrup

1 cup water
1 cup white sugar

Combine the sugar and water in a medium sauce pan on medium high heat.  Bring to a boil and reduce to medium.  Stir until the sugar dissolves and turn off the heat and remove from the burner.

Let the syrup cool and place in the fridge until cold.  Use the syrup for any cocktail or drink that calls for sugar as a sweetener.

Enjoy!


Easy Artichoke Bread

Thursday, May 16, 2013


Ready for one of the easiest appetizers of all time?  Well friends, here it comes.  I was craving artichoke dip after devouring it post-bar last weekend during a Bachelorette party.  It was creamy, delicious and the best food I have ever eaten.  I'm sure it didn't have anything to do with the fact I slung back a few shots and a couple (hundred) beers.  

So last night I wanted to re-create things a bit.  I didn't have the recipe from the other night but I did have a good idea of what was in there.  I have to say, this version has a bit more flavor (if I'm remembering correctly--it's a bit foggy) due to the red pepper flakes.  This recipe would be perfect for entertaining or like we had it, on a random Wednesday night with a big salad.  
Start with a block of cream cheese.  I used 1/3 the fat variety.
Grab a jar of these guys.  I love these artichoke hearts from TJ's.
Give them a good chop.  Toss them in the bowl with the cream cheese
Grate in a few cloves of garlic.  If you don't have a microplane, just give them a really good mince.
Toss in some parmesan cheese
Season All Salt
Black pepper
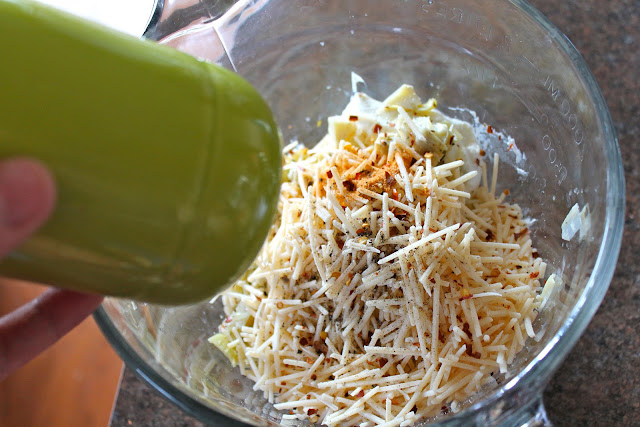
Red pepper flakes
And some dried parsley for a bit of color.  Give it a good stir.
And slather it all over a loaf of ciabatta bread
Sprinkle with a little more parm and into the oven they go
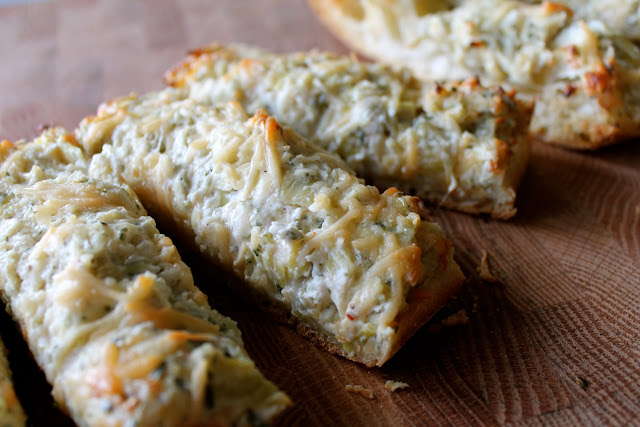
This is the end result.
Yep
Slice it up
And mow it down


Easy Artichoke Bread

8 oz cream cheese (1/3 the fat is okay)
8 oz marinated artichokes, chopped 
1 cup parmesan cheese + 2 tablespoons or so for topping
1/2 teaspoon Season All Salt
15 cracks of black pepper (or about 1/8 of a teaspoon)
A large pinch of red pepper flakes 
3/4 teaspoon of dried parsley
1 loaf of ciabatta bread 

Start by preheating the oven to 400 degrees. 

Combine the cream cheese (it's easier if it's at room temp), artichokes, parmesan cheese, Season All Salt, pepper, red pepper flakes and dried parsley.  Stir until fully combined.  

Cut the ciabatta bread in half and spread the artichoke dip over the inside of the loaf.  Sprinkle with additional parmesan cheese.  

Place on a baking sheet and put into the oven for 25 minutes.  After 25 minutes, check to see how it is doing.  Bake until the top starts to turn golden brown and is heated through.  

Slice into strips and enjoy!  

Recipe by: Mrs. Schwartz 

**Note, if you don't want to serve the dip ON the bread, you can put it in a baking dish and bake for about 20 minutes or until the top turns golden brown and is heated through. Serve with chips or sliced crusty bread.**

Slushy Make Ahead Lava Flow Cocktails and a Giveaway!

Friday, June 22, 2012


Lava Flows without a doubt remind me of spring break circa 06/07 although then they were called "Miami Vice."  These were an absolute staple at the all-inclusive swim up bar.  The bartenders would groan when we would order these and to be honest, now I know why.  They are a process and a half to make.  However, they are so worth the effort, I swear.  

I made two versions of these, one that I had to taste test for quality control purposes and enjoyed on the spot.  The second version I layered into mason jars and tossed them in the freezer for my college girlfriend get together.   I just had to give them a few minutes on the counter to defrost a bit and they were just as slushy as the first version.  Since they are a bit labor intensive it worked out perfectly to pop them in the freezer and they were GTG when the ladies arrived.  

Not going to lie, I'm going to make a big o' batch of these for the summer so I can enjoy them on the hot evenings after work.  

Oh and scroll down to the bottom for the adorable giveaway!  :) Happy weekend.  
 Start with the Pina colada portion of the drink.  Add a bunch of ice to the blender.
 Pour in the juice from a can of pineapple.
 I first made the virgin kind of pina colada (AHHHH ONE OF MY GIRLFRIENDS IS PREGS) so I had to boost the coconut flavor a bit since hers would be without the coconut rum. I used some of this Coco Real stuff.  So good.
 Pour that on in.   Super thick stuff.
 Toss in the pineapple.
 And coconut milk. Blend away.  This was the virgin portion and I scooped out some of it and popped it into the mason jar for Momma and baby.
 Then added the booze for the rest of us.  Coconut rum to be exact.  Blend again and pour into mason jars to fill them half way.  Not sure why I didn't take a picture of this but I didn't.  You will see the end result in a bit.
 Then work on the strawberry daiquiri portion of the drink.  Don't worry I completely washed out the blender so there wasn't any booze left over for the baby.  I hear booze is not good for a developing baby, just a rumor.  Anyway, add a bunch of ice.
 Some frozen strawberries.
 And strawberry daiquiri mix.  I know, I cheated but this stuff really ensures the perfect flavor.  Blend away again.  At this point, I took out some for Momma and Baby again.  Then added some white rum for the booze hounds.
 Perfect consistency.
Here is the enjoy now version.  
 Takes me back to spring break.  Just missing the Pitbull and Daddy Yanke music in the background.
 Cheers.  I do have to say, I could get used to this drinking during the day working from home business.
 Here is the make and freeze version.  I used a spoon to push the daiquiri to make it more "flowy."
Pop the lids on
Make sure to mark the special version (if you have any) and into the freezer they go.  
 Like I said, they only need a minute or two on the counter to be back to the original consistency since the booze doesn't allow them to freeze all the way through.
 I see a whole lot of these cocktails in my future.
Cheers.
 Now on to the giveaway.  Did you love that yellow straw?  Well folks I happen to be obsessed with the new paper straw trend.
How stinkin' cute are these?  Do you see that one with the little red hearts?  I die.

So, I figured it's summer and I should probably host a giveaway for these little ditties.  I contacted Jillian from Crafts by Jilly on Etsy and she agreed to give 25 straws in the color or colors of your choice to a lucky reader!  Here is a little bit about Jillian and her shop:

My name is Jillian Quinn and am a proud Army wife, that tries to stay very busy. I am currently in school for a bachelors in psychology and also just starting out with my own business which I named Craftsbyjilly. I started Craftsbjilly with just a few items that I had made but then slowly built it up to everything I have now and still adding items daily! Some items that you will find in my store is paper straws, cupcake liners, baking cups, washi tape, and so much more!


Here's the scoop.  To enter you will need to use the widget below.  Super easy, you can either like Mrs. Schwartz's Kitchen on Facebook, follow Mrs. Schwartz's Kitchen on Pinterest or leave a blog comment saying what you would use the straws for.  The contest ends at midnight on Tuesday June 26.
a Rafflecopter giveaway

Lava Flow

For the Pina Colada: 
8 cups of ice
1 cup pineapple juice (from the canned pineapple)
2 tablespoons cream of coconut
1 cup coconut milk
1 cup canned pineapple
4-6 ounces of coconut rum (depending on your taste/alcohol tolerance : )

Place everything in the blender and blend until smooth.  If you want to make virgin coladas, leave out the rum and add additional coconut milk or pineapple juice until you reach your desired consistency.

If you are making the freezer version, fill mason jars 1/2 full with Pina colada.  Set aside.

For the Strawberry Daiquiri:
8 cups of ice
1 1/2 cups frozen strawberries
1 1/2 cups strawberry daiquiri mix
4-6 ounces white rum (depending on your taste/alcohol tolerance : )

Place everything in the blender and blend until smooth.  If you are making a virgin daiquiri, leave out the rum and add additional daiquiri mix.

If you are making the freezer version, layer on top of the Pina colada to fill the mason jar and use a spoon to push the daiquiri into the Pina colada to create the "lava flow" effect.

Place in the freezer and take out when you want to enjoy.

**Disclaimer, the boozy versions stay slushy because they have alcohol in them.  If you do not use the booze, they won't have the same slushy consistency however, they will still taste delish.**

Recipe by: Mrs. Schwartz

Made With Love By The Dutch Lady Designs