Grandma Nothnagel's Spare Ribs with Baked Smashed Potatoes

Saturday, November 26, 2011

Have you missed me?  Wow, I have sure missed you--and blogging.  I have been dealing with some technical issues with my computer as in Safari (the Internet) just shuts off when it pleases, my computer is too full to download any music and or pictures and my pictures wouldn't load onto Blogger.  Uggghhhh.  I'm not a techy person by any means so this has been a huge headache for me.  

Therefore, Mr. Schwartz and I made a little trip to the Apple store.  We picked out a new computer for me (YAY!!) and an external hard drive for pictures and music.  I'm puuuumped!  Things should be arriving shortly.  But, I had to post a few recipes before then so I struggled through and was able to get these pictures onto our computer.  

I think my Grandma had a little something to do with it since I'm posting one of her best recipes: Pork Spare Ribs.   These things are out of this world.  My mom always made them in the oven but I decided to give them a shot in the crock pot.  Overall they came out perfectly, moist and tender.  But, there was too much liquid.  So I would forgo the amount of water as in the recipe later on.  

I better get to it before my computer starts acting like a jerk again.  

Musical Selection: 1901 by Phoenix.  I am obsessed with them lately.  Grandma would probably not enjoy them. But, you never know. 
 Ok first, my Auntie Lois gave me this wonderful cook book comprised of my Grandmas recipes for my bridal shower.  I cried when I read it.  It is sweet, funny and very useful.  There are tons of pictures of my Grandma, her girls and my Grandpa Jack that I unfortunately never met.  I'm told that he had a mean shot and didn't take any shit.  (Sorry for the language, I know your reading, Mom, but you know it's true.)  And, since I mentioned my Mom....
 Here is a FANTASTIC picture of her with her sisters.  Can you guess which lovely lady she is?  Oh yeah, she is that goon with the wild hair going nuts by Lake Superior.  What a wack-a-do!  I'm told this was the firs time they took a trip off of their farm.  Apparently she was pumped...I don't blame her and I guess I understand where I get it from.
 Here are a few other recipes--they must have been favorites considering the stains on them....
 Yep, thats my Grandma and Grandpa.  They were B.A.
 Oh and before I get to the recipe I used--incase you were looking for a recipe for cough medicine...here it is.  Please note that kids should only have a teaspoon every 15 minutes.  Don't worry it's from Dr. Alden.  Maybe my mom had a cough on their trip to Duluth?  Just kidding Mom.
Okay, here is the recipe. As you can see it was one of my Grandpa's favorites.  For good reason, they are fantastic.
Typically my Mom makes these bone-in but I prefer the boneless variety.  More meat, more meat! 
 Start with the sauce.  Ketchup...
 Oh and clean out your ketchup bottle withs some water and add that too. My Grandma would approve.
 Add some vinegar.
 Worcestershire sauce....
 Salt...
 Cayenne pepper....
 Chili powder...
 Pepper and a few red pepper flakes.
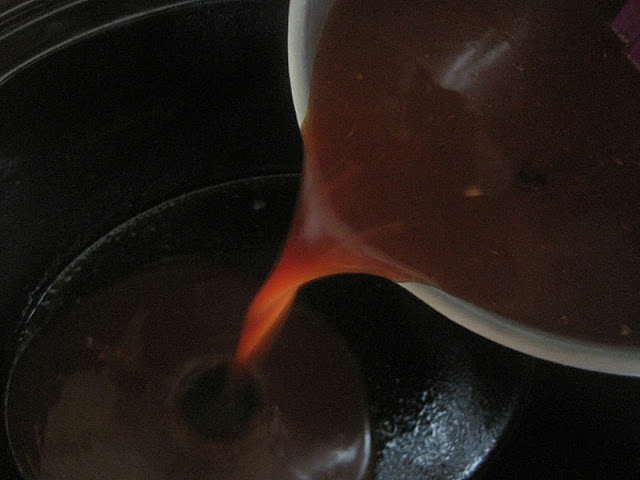
 Spray the crock pot insert with cooking spray and pour half of the sauce into the bottom.
 Cut up an onion and place it on top of the sauce.
 Add the spare ribs and top with additional sauce.  Cook on low for 6-8 hours.
 Meanwhile you can prepare the potatoes.  Scrub the potatoes and cook on medium in salty water until fork tender.
 Place them on a cookie sheet and use a glass to smash them like this.
 All smashed up....
 Drizzle with olive oil season with salt and pepper.  Bake in the oven for about 15 minutes or until the skins are golden and the inside is creamy.
 Ahhh helllo Sunday Supper!
Amazing.  Enjoy kids. 


Grandma Nothnagel's Spare Ribs: 

1.5-2 lbs boneless (or bone-in) spare ribs
1 teaspoon salt
1 teaspoon pepper
3/4 ketchup
2 tablespoon Worcestershire sauce 
2 tablespoons vinegar 
1 teaspoon paprika
1 teaspoon chili powder
1/4 teaspoon cayenne pepper 
1/4 cup water 
1 medium onion 

Mix salt, pepper, ketchup, Worcestershire sauce, vinegar, paprika, chili powder, cayenne pepper and water.  Pour half of the mixture into a crock pot insert sprayed with cooking spray.  Chop onion in to quarters and place on top of sauce.  Place spare ribs on top of the onions and sauce.  Add remaining sauce.  Cook 6-8 hours on low.  Plate and top with additional sauce.  

Enjoy! 

Recipe by: Grandma Nothnagel 


Baked Smashed Potatoes

8-10 red skinned potatoes
2 tablespoons olive oil
1 teaspoon (or so) sea salt
1/2 teaspoon (or so) cracked black pepper

Scrub potatoes (keep skin on) and cook in salty water until fork tender.  Once tender, place on a greased cookie sheet and smash with the bottom of a glass. Drizzle with olive oil and season with salt and pepper.  Bake in a 400 degree preheated oven for about 15 minutes or until the skin/edges are crispy and the inside is soft and fluffy.  

Enjoy!

Recipe by: Mrs. Schwartz 

Reece's Peanut Butter Cup Cookies

Tuesday, November 22, 2011

This past weekend I was at Scrapbook Camp.  Yes, you read that correctly.  It was the whole sha-bang too; sleeping in bunk beds, eating in a dining hall, exchanging papers with each other and buying overpriced coffee to keep working until midnight or later.  I understand that this sounds completely dorky however, I really did have a great time.  

My mom and her cousin/s have been going for a while, then my Auntie Geri started going and lastly my sister (in-law) Emily and I joined in as well.  Unfortunately one of Em's twin girls got sick and she had to go home early but we did have a great time catching up chatting and laughing the days and nights away.  

Speaking of lady time, I do have one last recipe from the Lady Party I hosted earlier this month.  We had a boatload of Halloween candy left over so I figured I would put it to good use.  I made these Reece's Peanut Butter Cup Cookies and they were pretty unstoppable.  As most cookies these little babies are best straight out of the oven with a cold cup of milk.  

Musical Selection: Girlfriend by: Phoenix.  It just makes me so happy.

Start with the regular cookie base: butter and sugar...
Add your fav peanut butter.  This is mine, Natural Skippy.  Don't mind me while I take a spoon to that...
Add some brown sugar as well...
Combine until fluffy.
Add egg.
Add the vanilla.
Milk.  Confession: I used fat free 1/2 and 1/2.  Don't run out to buy 1/2 in 1/2 if you have milk, it will still turn out.
Huh, it appears that I did not take a single picture of sifting nor adding the dry ingredients.  I suppose that is pretty boring--but it does have to happen.  Add the dry ingredients gradually....let's get to the fun stuff....
Unwrap the Reece's.  And make sure not to eat any of them.  That is a strict order.
Chop em up. Again, don't eat any....I'm sure.
Stir in the Reece's with a rubber spatula.
Scoop onto a greased cookie sheet or a cookie sheet lined with a silpat mat.  Oh I love thee silpat mat.  For real, if you have a baker in your life that does not have one of these--THE perfect Christmas gift.  They will remember you every time their cookies and other baked goods come out perfectly.
8 minutes later these peanut buttery, chocolately, chewy nuggets will be all yours.

Alternative to pumpkin pie anyone?

Reece's Peanut Butter Cup Cookies

  • 1 3/4 cups all-purpose flour
  • 1/2 teaspoon salt
  • 1 teaspoon baking soda
  • 1/2 cup butter, softened
  • 1/2 cup white sugar
  • 1/2 cup peanut butter
  • 1/2 cup packed brown sugar
  • 1 egg, beaten
  • 1 teaspoon vanilla extract
  • 2 tablespoons milk
  • 12 large chocolate covered peanut butter cups, unwrapped

  • Preheat oven to 375 degrees.
  • Sift together the flour, salt and baking soda; set aside.
  • Cream together the butter, sugar, peanut butter and brown sugar until fluffy. 
  • Beat in the egg, vanilla and milk. 
  • Add the dry ingredients mixture; mix well. 
  • Cut peanut butter cups and fold into the cookie batter with a rubber spatula. 
  • Scoop onto a greased cookie sheet or silpat mat.  
Bake for 8-10 minutes. 

Enjoy with a big glass of milk! 

Recipe adapted from: here 

Pumpkin Whoopie Pies

Thursday, November 17, 2011

Raise your hand if you are annoyed that you keep on hearing about this so-called "Lady Party" but not one single recipe has been posted!  Ya ya, I know, bad blogger.  But here, right in front of you is one of my favorite desserts I served at the Lady Party. Hello Pumpkin Whoopie Pies, nice to meet you.

These are basically everything you love about a moist and delicious pumpkin roll but in a travel size.  I was so excited these turned out and that they were so close to the amazing pumpkin roll my cousin Margie makes!!! YUM.  I do have confirmation that she will be making said pumpkin roll and bringing it to Thanksgiving this year. Holler.  

These were quite easy to make and even easier to eat. I made them the day before and filled them the day of the party.  I'm not 100% sure I would recommend this as the cake part of the whoopie pies is very moist and the tops almost became sticky from being covered over night.  I took the cover off and let them sit for several hours uncovered and they were better but just a little tip for ya.  

Without further introduction, Pumpkin Whoopie Pies.  

Musical selection: Giving Up The Gun by: Vampire Weekend.  love.
Start by setting our your butter and eggs.  I hear this works wonders but, I don't have that confirmed.  Please note that setting out the butter is for the cream cheese filling, not the cakes....
As you see here, the butter is melted in the cakes.
Add packed brown sugar to the butter.
And stir to combine.  Note that I did not use my mixer to make the cakes.  It was so easy to do in a large mixing bowl.
Add the eggs.
Pumpkin puree. I used the remainder of the can for these.
Add the pumpkin pie spice....it helps to just take the cap off and scoop it instead of shaking the dickens out of it until you have what you need. Ah yeah, don't be lazy.
Also add the vanilla...
Baking powder....
Baking soda....
And salt.
Stir to combine.
Then add the flour.
Fold in gently until it is just combined. I find that it is easiest to fold with a rubber spatula.
Like this. 
Scoop out portions with a small ice cream scoop or cookie scoop.  I used the middle sized cookie scoop from Pampered Chef--thanks MA!
I also used my silpat mat.  Wow, these things rock my world.  So easy to clean, nothing sticks to them and they bake evenly.  I would totally suggest investing in a couple of these babies.  Sorry to burst your Pumpkin Whoopie Pie bubble, but I forgot to take a picture after I took them out.  I promise they were golden and delicious.  I tested to see if they were done by pressing down in the middle they should feel "springy."  Know that I am not a baker and I had no idea what "springy" was...until I pressed down in the middle when they were done baking. Totally "springy." It will be okay, I promise.

Once the cakes were cooled I took them off of the cookie sheets lined with silpats and place them into air tight containers layered with parchment paper.  They did not stick but remember they need some time to air out before filling and plating.
The next day I made the cream cheese filling/frosting.  Start by beating together your cream cheese and room temp butter.
Like so....
Slowly incorporate the powdered sugar while your mom tells you its going to fly everywhere because it is on too high of a speed.  As if I don't know what I'm doing--yep, powdered sugar everywhere.  Mommas always know.
Moving on, add a pinch of salt.
And some vanilla.  I also added a dash of cinnamon but A. I didn't take a picture of it and B. I don't think you could taste it.
But wow, look at that.
Now, I have a little trick to show you from Pinterest.  Start by laying out some plastic wrap.  I can't believe I even had any of this garbage--we are a 100% Press and Seal home.  But, luckily I had some of this blasted, no good stuff.
Roll it up on the ends and make your self a little cream cheese frosting cylinder.
Put your coupler (what is that thing called, that you put into the pastry bag that you screw the other part onto so it makes decorative frosting? Wow, I should google it. Better yet, why don't you just tell me). Place it into your pastry bag and pull one end out.  I had to use a tini tiny little tongs to get mine out. Be creative. My Momma was half way out the door to get the needle nose pliers.  No need, this kitchen has it all.
Snip the end and screw the other parts of the coupler/tip on to the bag. Please someone tell me the correct terms.
Okay, you are thinking what in the HECK is this?  Yep, I had a major frosting blow-out.  Be sure not to over-do your frosting in the cylinder.  Just so you know, it would be best to separate your frosting into two different sections and do one at a time.   I did use all the frosting so don't skimp but, the reason you use the plastic wrap is so you don't have to clean the pastry bag and it works great.  So, lesson learned, two batches of frosting, don't plop it all into one cylinder, you hear me!?

Anyways, put a good amount of frosting on one cake and place and gently squeeze the other cake on top.
They will look like this....
And this.  Enjoy with coffee...Oh man I wish there was some of these left. 

Pumpkin Whoopie Pies 

  • For the cakes:
  • 1 1/2 sticks (6 ounces) unsalted butter, 1 stick melted, 1/2 stick softened
  • 1 cup packed light brown sugar
  • 2 large eggs, at room temperature, lightly beaten
  • 1 cup canned pure pumpkin puree
  • 1 tablespoon pumpkin pie spice
  • 1  teaspoons pure vanilla extract
  • 1 teaspoon baking powder
  • 1 teaspoon baking soda
  • 3/4 teaspoon 
  • 1-2/3 cups flour
  • For the filling: 
  • 4 ounces cream cheese, chilled
  • 1 cup confectioners' (powdered) sugar
  • 1 teaspoon vanilla extract
  • 1 pinch of salt
  • 1 dash of cinnamon

  • Preheat the oven to 350°. Line two baking sheets with parchment paper or use two silpat mats.
  • In a large bowl, whisk together the melted butter and brown sugar until smooth. Whisk in the eggs, pumpkin puree, pumpkin pie spice, 1 teaspoon vanilla, the baking powder, the baking soda and 3/4 teaspoon salt. Using a rubber spatula, fold in the flour.
  • Using an ice cream scoop or tablespoon, drop 12 generous mounds of batter, spaced evenly, onto each baking sheet. Bake until springy to the touch, about 10 minutes. Transfer to a rack to cool completely.
  • Meanwhile, using an electric mixer, cream the softened butter with the cream cheese. Add the confectioners' sugar, the salt and  vanilla; mix on low speed until blended, then beat on medium-high speed until fluffy, about 2 minutes.
  • Spread the flat side of 12 cakes with the cream cheese frosting. Top each with another cake and press gently. 
Enjoy!!! 

Recipe adapted from Rachael Ray's recipe I had printed off a while ago. 

Ps. weird formatting what!? Sorry.


Made With Love By The Dutch Lady Designs